
- Best Archery Accessories 2024 - March 19, 2022
- Bow string:Why does it keep hitting my arm? - February 2, 2022
- Bow square: A how to guide - February 2, 2022
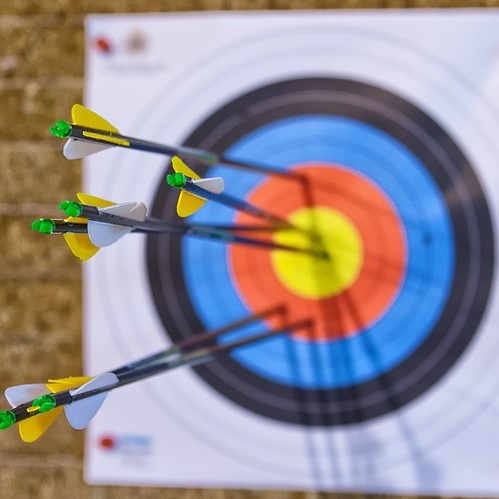
Archery is a fun activity that anyone can take part in. To become skilled at it, you need an archery target to practice and play an essential role in improving your skills.
No matter, if you are new to the sport or a professional having one keeps you in practice all the time to improve your accuracy. With so many people having a busy schedule, one does not always have the time to visit your local archery range. Having an archery target at homes makes things simpler.
Therefore, if you feel this is what you need we are here to help you make one in the comfort of the home.
If you want to skip making your own target, and buy one read made, click here
DIY Archery Targets
Before we get to the do-it-yourself of archery targets, you first need to understand that there are four types available. By knowing, the basics of each one will make your selection easier.
Bag Targets
The bag archery target is one of the most basic ones available, and every bow hunter to archer has practiced on one of them. The target is a bag filled with absorbent or synthetic material. When the arrow strikes, it will punch through the covering to hit the fabric on the inside.
You will be able to retrieve your arrow easily without struggling. If you are a beginner, the target works well for repetition. Furthermore, you need to remember archers use it mostly for field points. You cannot leave it out in the rain as it will deteriorate faster, but you can find weather-resistant ones available.
Alternatively, it is also ideal to use with a compound bow and works best with field points.
Block Targets
The block target is a next level setup and lightweight compared to the bag one. The archery target has a foam block construction. The solid foam one is more popular to buy as it provides solidity. When the arrow strikes, the material slows it down.
Unfortunately, this type of target is not as useful as the bag on but causes less damage to it. You can use broadheads with this one, but field points will lengthen the lifespan. The main problem is if the arrows buried deep it makes it difficult to remove.
To prevent this from happening you can turn the block so that the layers arranged vertically instead of horizontal. Furthermore, it is more suitable for outdoor spaces as you can set it up quickly and remove when done.
Paper Targets
This type of archery target is a sheet of paper with a circle and bullseye on it. These targets are popular and work for all marksmen, but they are fragile compared to the others. You can make or buy one, as they are affordable and sometimes sold in packs of more than one. Furthermore, you can place it on a wall with backing to shoot at. Alternatively, you can also use them with your bag target as well.
3D Targets
For one of the best archery target types, the 3D model works well. The item prepares you for different hunting scenarios. The archery target has a similar construction as the block one. However, it has added layers for target shooting to make it more fun.
They can vary in shape and looks typically like some animal. You can find it in wolf, dinosaur, to a turkey shape. Some of them even offer you point values, but the biggest problem is the foam wears out with time.
Furthermore, they work better with field point, as broadheads get lost inside the target.
These are the main archery targets available, and while you can buy them, you can learn to make one as well. By making one, it saves you loads of money in the end. Another important note is that different targets match certain bows, various tips, arrows, and more.
How to Make Your Own Archery Target
With the right archery target at home, it increases safety, helps save arrows, and improves your accuracy. Furthermore, making one is cheaper, and you can personalize it according to your shooting needs.
Lastly, as the majority of the material used is recyclable, and you can dispose of them without concerning yourself about the environment. However, before you start making your target, you need the correct height to set the archery target up.
The general rules to pitch it at a leaning angle to the ground about 70°. However, there are three more degrees you can use as seen in the table below:
| Inclination of Target | Height of the lowest point of the target above the ground | The horizontal distance between the highest and lowest point of the target |
| 60° | 2 feet and three ¼ inches | 2 feet |
| 65° | 2 feet and two ¼ inches | 1 foot and eight ¼ inches |
| 70° | 2 feet and 1 ½ inch | 1 foot and 4 ½ inches |
| 75° | 2 inches and ¾ inch | 1 foot and ½ inch |
As you can see, there are various brace heights, and some manufacturers recommend a brace height from 6 ¾ inches to 7 ¼ inches for a longbow. While other brands advice 7 to 7 ½ inches. On the other hand, if you only want to set up a target for casual shooting the archer’s target needs placing around a 15° angle with the center placed at 48 inches off the ground. For practice, you can adjust the height accordingly.
Making a Simple Bag Target
The construction of the bag archery target is simple and provides a sturdy structure for you to practice your shots.
Material Needed:
- Reusable shopping bag measuring 19 x 24 x 24-inches with straps attached on the back
- Three rolls of silver duct tape with two contrasting colors to decorate
- Palm fronds dried or any dried plant will work to pack it tightly
- Cardboard
Assemble:
- Take the cardboard and cut to size to contour to the front, back, bottom, and inside of the bag.
- Stuff the bag with the dried plants to fill it up and make it thick, should take about up to 3 palm fronds. Make sure to shape and fluff it to provide a sturdy square shape.
- Use the silver tape and close up the bag tight
You can use the alternating color of duct tape for archery scoring layered on the front to form a square bullseye. Here you can pin, glue, or tape any paper target as well. Alternatively, you can paint on the bullseye. Now you are done.
You can hang it on a stand made out of branches, or use makes it in an easel style. You can use the backpack straps to hold the bag up. However, it is not waterproof and best placed indoors when done.
Hot to make a DIY foam archery target
Here is an easy to make foam archery target and should last longer than your bag or paper target.
Materials Needed:
- 1 x 1 x 10-inch wood (should need about four pieces)
- 1 and 2-inch nails
- Wood glue
- Wood putty
- Electric sander or sandpaper
- 3 x 3 x 10-inch wood (should use about two pieces)
- Four casters
- Mesh or chicken wire
- Metal angle braces
- 1m x 1m carpet used for car trunks
- Wood paint or varnish
- Puzzle mats sold in packs of ten (five packs) with a 1’ x 1’ dimension
Assemble:
- Start by laying the mats down and connecting nine pieces, creating a wall of 3’ x 3’ in dimension. Once stacked they will be about 1 foot thick (you can use your own dimensions if preferred)
- Take the 1 x 1-inch wood to make a box, and you can use scrap plywood to form the walls and flooring. The size of the box is bigger than 3’ x 3’ x 1’ making it able for you to slip in the sheets from above if needed. Here is where you will use your nails, wood glue, wood putty, and sander to complete the box.
- Take the angle braces and place them in the box for reinforcement to prevent it from wobbling.
- Use the rest of the wood pieces to make a frame for the back, cover it with the mesh or wire, and fix it to the rear of the box.
- Take some of the 3 x 3-inch wood and make feet to keep the box stable and place the casters underneath for mobility.
- Fill up the cracks with the wood putty and sand it down smoothly.
- Place the puzzle mats inside the box.
- Now make a box front using the 1 x 1-inch wood and nail or staple the carpet on the square and fix it to the front of the box. You can add more puzzle sheets to compress it more to give it a slight bulge at the carpet.
- Complete it by giving it a varnish and use any target face made of paper on the front.
Make a DIY 3D Archery Target
Making a 3D target for practicing archery does not have to be complicated. Here are some steps you can follow:
Materials Needed:
- Newspaper
- Polyurethane Foam (Aerosol)
- Drill
- Screws
- Cardboard (one-dimensional) or turkey trap made of foam
- 1 x board measuring 2 x 4 feet and 1 ft long
- 2 x boards measuring 2 x 4 feet and 3 ft long
Assemble:
- Take the old newspapers and create several layers to make a cover for the flat exterior
- Place the turkey trap or cardboard on it
- Sheet one whole side of the decoy with a fine spray of foam (to start creating bulk)
- Leave to dry for 24-hours
- Turn the trap over and coat the other side as well and leave for 24-hours to dry (keep the layer of foam thin)
- Repeat both sides and leave it to dry, do this until you are satisfied with the bulkiness of the target
- Now take two pieces of the boards (3 feet long) and lay it down parallel to another to build a stand.
- Place a one-foot length of the board on the upper side to form an “H” and fasten the boards with the drill and screws
- Now fasten the 3D decoy with the drill and screws by making sure it stands in the middle of the “H” shape
Your 3D target is ready to use, and if you need to do spot repairs, you can spray on more foam to fill up the holes.
Buying Guide for Archery Targets
Now if you do not want to make the archery target and want to purchase one instead—you can follow the following criteria to get the right one.
The Size is Important
When looking for the best archery target, you need to consider the size. The larger the target the more difficult it becomes to move, as it is heavier. Furthermore, the size also can affect your visibility, as you do not want to squint at it from yards away.
Durability
Another crucial thing to remember is how durable the archery target is. You do not want to spend a fortune only to find you have shot right through it the first time. You must be able to make thousands of shots using the archery target. The best options available are the bag and foam ones as they can handle powerful shots.
How easy is it to remove the arrow?
As you will be using the archery target for more than thousands of shot, you want to be able to remove the arrow with ease. You do not want to stand there struggling to remove it and waste precious time to improving your skill.
The Set-up
Some archery targets need a stand allowing you to make comfortable shots. Here weight plays an important part, as you need to carry it around. You will want one that is quick to set up and remove when needed.
These are some of the factors to consider when purchasing your archery target. Lastly, price is also crucial as different types of archery targets come at a cost. For example, paper targets are more affordable if you already have a bag or block target in place. Buying a new block or bag target can be costly in the end. Making your archery target becomes more cost-effective in the end.
Final thoughts
We know there is a lot to consider when you are searching to buy an archery target. You want to feel assured the item meets the archery regulation guidelines and comprise durable material that will represent your goals. Whether you shoot for pleasure, competitions, or hunt, you can find plenty of options available to purchase.
However, creating your own archery targets with hardwearing fabric will help you achieve your goals as well. Whether you plan to buy one or make one, you can create any of the archery targets here. The important thing is to stay in practice if you want to achieve the best results as an archer.